Sunday, April 22, 2012

Making a polymer clay dolphin jar

Recently my best friend, Monica, came for a visit.  Not only is Monica my very best friend (we were roommates in college and have been friends ever since), but she's also one of my best customers!  Every time she visits she checks out all the sculptures, plushies, and jewelry I have for sale.  This time around she spotted my clay covered jars, which can be found in the Housewares section of CreativeCritters.  She liked them all, but asked if I could make her a special jar with dolphins and make it in purple.  She's always loved dolphins and purple is her favorite color.  Of course I was more than happy to create a dolphin jar for her!  Once she described what she wanted I was able to visualize it quite clearly, and knew how to create the jar.  One of the hardest things was finding the perfect dolphin stamp.  I knew exactly what I was looking for, and spent over an hour online until I found exactly the right one.
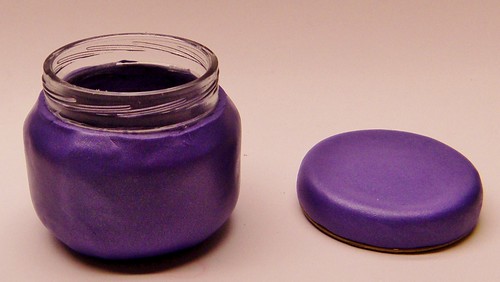
To create the right color of clay I mixed equal amounts of purple, silver, and turquoise to come up with this beautiful shade of purple.
The next step was to cover the jar and lid with the clay.  I used a glass baby food jar with a metal lid and coated the jar and lid with tacky glue to help the clay stick to the smooth surfaces.  I let the glue dry then wrapped the clay around the jar, making sure to press out any air bubbles.
 
 
Then I stamped the dolphins around the jar.  I tried using the stamp while it was still mounted to the wooden block, but that didn't work out too well.  So I carefully cut the stamp off the block and had much better luck getting nice clear impressions.  I was able to wrap the stamp around the jar and press it deeply into the clay.

 
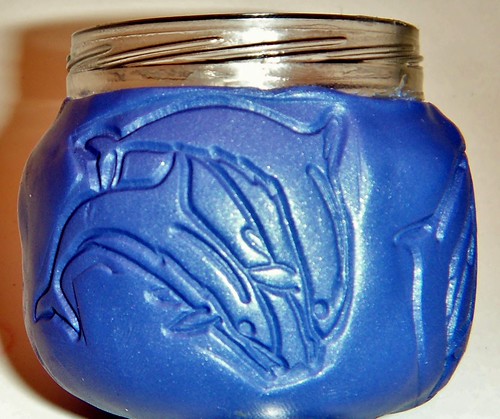
I changed the position of the stamp each time so the dolphins look like they're in motion.  I was thinking of a whole school of dolphins leaping through the water as I made this.
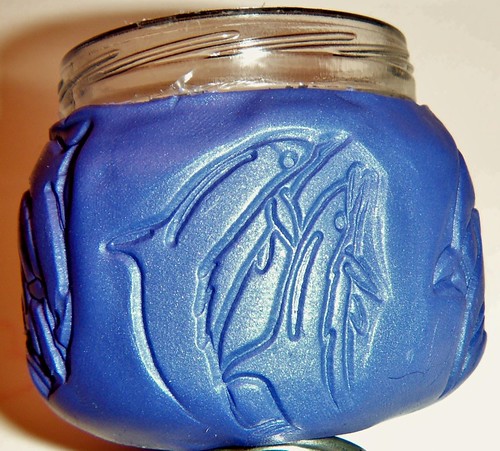
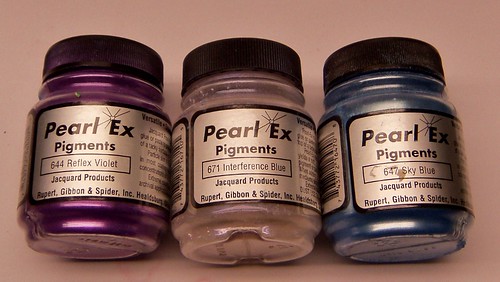
Once the dolphins were stamped onto the jar it was time to add that special Pearl Ex shimmer.  Once again, I knew exactly the color I wanted, and that required mixing several colors of Pearl Ex.  Over time I've gotten pretty good at figuring out what to mix to create a certain color.  This project required a bluish purple, which I achieved by mixing Sky Blue, Interference Blue, and Reflex Violet.
 
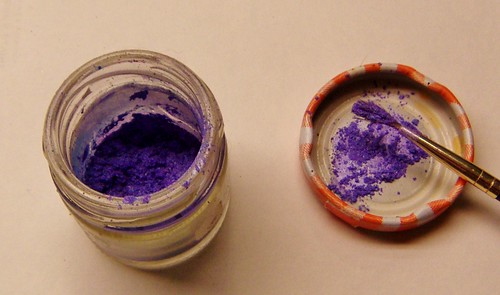
I adjusted the amounts of each color as necessary and came up with this beautiful shade of purple.
 
 
I used the pad of my finger to rub the purple powder on the raised surfaces of the clay.  Then I decided I wanted the dolphins to stand out from the background a bit more, so I rubbed their bodies with Sky Blue Pearl Ex.  I wanted to add a little something extra to the background, so I used part of another stamp to impress swirls and lines of movement.  It's amazing what a difference a tiny little thing like that can make.  Now it really looks like the dolphins are leaping through the water.
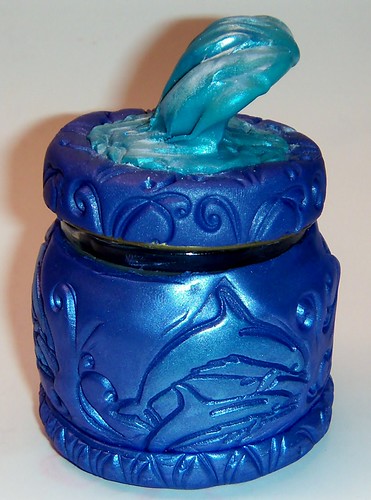
I also added a base and used a different part of the stamp to add texture.  I sculpted a wave for the lid and stamped watery swirls  on it as well.  I dusted the wave with Sky Blue and Interference Blue Pearl Ex powders.  I put the jar in the oven for it's first bake at this point.  I didn't want to mess anything up and I wanted the wave to be baked before I added the dolphin.
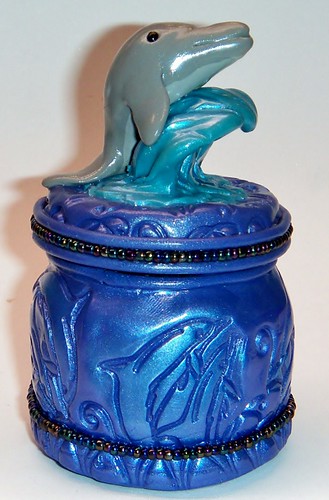
Once the jar cooled I added a string of beads along the base, added a rope of clay around the top of the jar to give it a more finished look, and added another string of beads around the lid.  I sculpted the dolphin using shades of blue gray clay (a custom mix, of course), and posed him on top of the wave.  I applied liquid clay to his belly and pressed him firmly onto the wave to be sure he was attached well.

After two coats of high gloss varnish dried I glued blue felt to the bottom of the jar, wrote a special message on the felt, and called it complete.  Now it's ready to be shipped off and make Monica very happy ;-)  The one thing that I added that can't be seen in pictures is plenty of love and positive energy.  The entire time I was working on this piece I was thinking happy thoughts of my friend and all the fun we had together.  I think that comes through in the finished product.  I want Monica to smile and be happy every time she looks at this jar. :-)
Thanks for stopping by and following me though another creative adventure!


Tuesday, April 10, 2012

The Knit Dragon I Made for Morgan

My best friend's son, Morgan, just turned 9 and they'll be visiting this weekend.  I wanted to make something special for his birthday and decided to knit him a dragon.  Morgan loves dragons and I've made him several different types of dragons in the past (even a dragon trinket box).  I only had a vague idea of how I wanted this dragon to turn out when I first started knitting, and I made the pattern up as I went along.  This is definitely a one of a kind creation!  I used a combination of knitting looms in different sizes to create the body, head, and tail of the dragon. 
I held two strands of different shades of green and  one strand of blue yarn together as I knit the body. head and tail.  The underbelly was knit using knitting needles and yellow yarn and I just sewed it right to the belly.  At each step in the creation of this dragon I had to visual how I wanted a particular part to look, and then figure out the best method to use to achieve that look.  It was a bit like sculpting in polymer clay, actually.  I used a small knitting loom to create his haunches and knit his lower legs with needles, then sewed all the parts to the dragon, shaping as I attached them.
 
I needle sculpted his face to get the right shape and even knit a red tongue for him.  His oversized ears add to the whimsical look.  I want Morgan to smile every time he sees this dragon ;-)  I cut out green felt and attached the eyes through the felt.  This gives a little more definition to the eyes and also ensures that they won't pull out through the stitches in the yarn.
 
I knit yellow triangles for spike and for the tip of his tail.  I wanted to have a nice bright, cheerful color.  I know Morgan likes blue and green dragons (they're the good ones, according to him), and I think the yellow is a nice contrast to these colors.  
 
The only thing that isn't knit from yarn on the dragon are the wings.  I chose to sew them from green and blue fleece instead.  I sewed pipe cleaners between the layers of fleece to help support the wings and allow them to hold their shape.
 
I can attest to the fact that this dragon is a lot of fun to play with too ;-)  I can't wait to see my friend and her family, and get Morgan's reaction to his new friend!  I'm already thinking about making a knight to go with the dragon.  That might be a good gift for Christmas.  One of the many things I love about Morgan is that he really appreciated the gifts he's given, and he plays with them for years.  He still plays with the first toy I made for him!  
Thanks for joining me for another creative adventure into the land of fantasy! ;-)