Friday, April 22, 2011

Progress on my flower garden sculpture

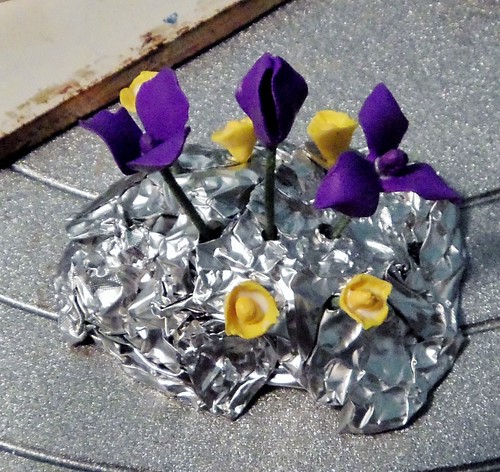
If you read my first post you know I'm sculpting a flower garden in honor of Gramma, who passed away last May.  When I last posted I had sculpted the base, fence, roses, and hydrangeas in polymer clay.  The flowers I wanted to sculpt next were the Irises and daffodils.  Because I'm working on such a small scale I simply bent the end of the stem wires and dipped them in purple paint for the Iris centers and yellow paint for the daffodil centers.  I tried sculpting polymer clay centers around the wire, but they were just to big.  So I figured  the painted wire would work better.  After the paint dried I sculpted the first set of petals for the irises and the trumpets for the daffodils.
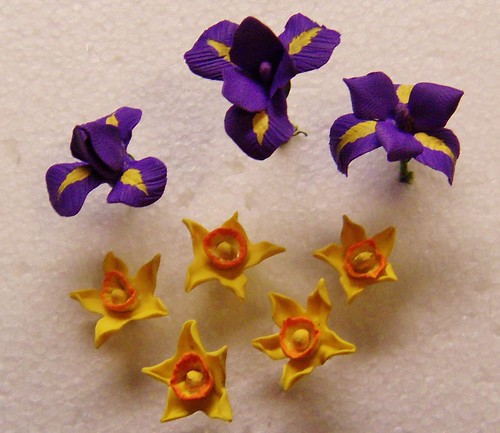
I'll be baking these flowers twice before adding them to the sculpture.  Baking them after adding each set of petals makes them much easier to work with.  After the outer petals have been added for all the flowers and baked I painted the edges of the daffodil trumpets orange and the centers of the Iris petals yellow.  You can see how I textured the petals to make them as realistic as possible.
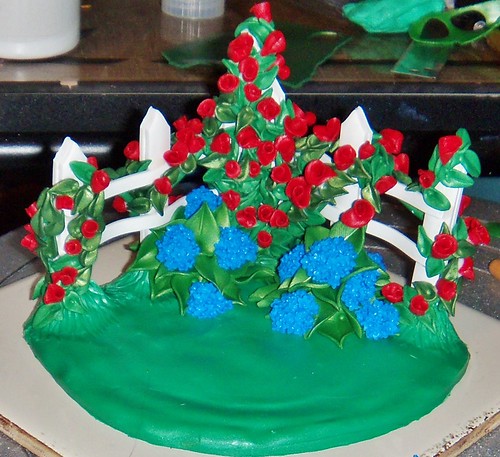
The next step is to give them leaves and "plant" them in the garden..  You might notice there's a tiny bunny hiding between the Hydrangeas.  Gramma has always had bunny rabbits in her yard, so I thought it was only appropriate to add one in this little garden.  The bunnies have usually been pretty good about not eating our plants (the neighbor's poor tulips seem to be their preferred snack- LOL).

I'm trying to keep the flowers looking natural and of course I want the piece to look balanced.  The next flowers I want to add are Tulips and Hyacinths.  From there, I'm not sure what flowers I'll make.  I have quite a few to choose from, but some make be too difficult to sculpt, at least on this scale.  So far I'm very happy with the way this is turning out- it feels "right" and it's flowing well.  Plus studying all sorts of flowers online and in my yard is sure to put me in a good mood ;-)

Thanks for following yet another creative journey!  Stay tuned for the next installment!

-Michelle of CreativeCritters

Thursday, April 21, 2011

Month 2 Strength Workout for the Self Drop 10 Challenge

I just wanted to share the strength training moves for month 2 of the Self Challenge.  I love working out on the stability because it adds a balance challenge to any move you perform.

Add in your Tabata intervals for cardio and you'll burn tons of calories!  Warm up at an easy pace for 5 minutes.  You can create your own moves if you're working out at home (which is what I do).  I do jumping jacks, high knees, jump rope, butt kicks, jump squats, and a few I make up as I go along.  Perform the move for 20 seconds, giving it all you've got, then rest for 10 seconds.  Repeat this 20/10 cycle eight times, then cool down for 5 minutes at an easy pace.  This gives you a 14 minute workout (not including the strength moves in the video).  If you're like me and want more, you can always add more intervals.  This can be done on the treadmill, elliptical, or other cardio machine too.  I'm able to keep my heart rate at the top of my fat burning zone the entire time I'm working out, and those 10 second rests really do help.  As always, Self has created a great Challenge that will work wonders for your body!
-Michelle of CreativeCritters

Gardening in NE Ohio can be a challenge!

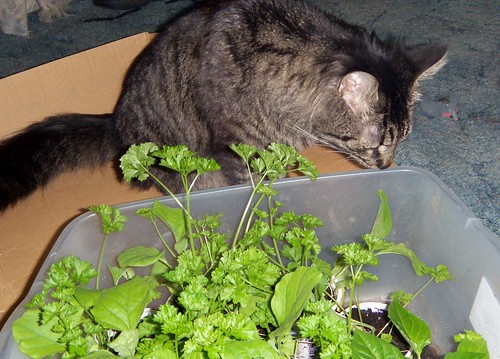
I've lived in NE Ohio all my life, so you figure that by now I'd know what to expect when it comes to the weather and be able to plan my gardening activities accordingly.  Unfortunately the one thing about our weather that you can count on is that it's unpredictable!  I've been gardening for almost 15 years, and I've had to get pretty creative to help my plants thrive some years.  This year I started my Bell Peppers and Eggplants indoors a little earlier than usual because they take so long to produce vegetables.  A few weeks ago the weather was pretty nice so I started hardening them off by leaving them outside in a sheltered location for a few hours a day.  Gradually I increased the time outside and their sun exposure.  This allows them to adjust to outdoor conditions, which are quite different from what they've been growing in inside.  Calcifer enjoyed checking out the plants after I brought them in each day.
 
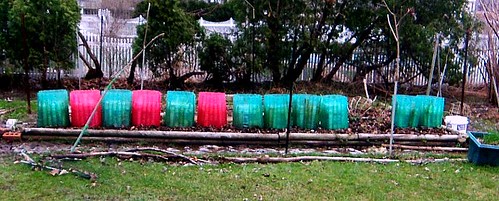
I've learned from experience that simply putting these plants in the garden with no additional protection is risky.  In Spring we have severe thunderstorm with heavy rain, gusty winds, and sometimes even hail.  I've lost many plants to the ravages of a Spring storm!  Wall O Waters have helped save many plants since I started using them.  They're plastic tubes you fill with water and they form a teepee over the young plants.  The water warms in the sun and protects the plants from cold weather by raising the temperature inside.  They also protect the plants from wind, heavy rain, and hail.
 
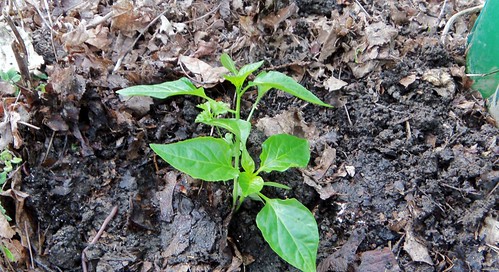
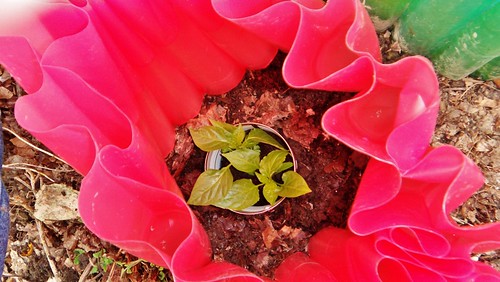
I set these out a week before I planted my peppers and eggplants so the soil would warm up.  Then when I was ready to put the plant in the ground I moved the Wall O Water and centered the plant.  These are two of my pepper plants.
 
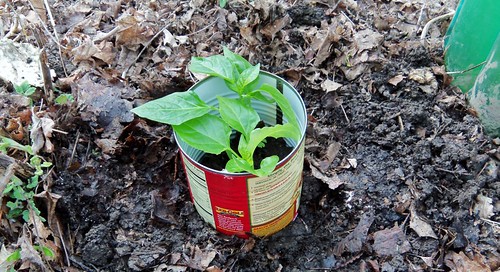
Then I do something that may seem weird- I place a can with the top and bottom cut off over the plants and press it firmly into the dirt.
 
This acts as a protective collar and keeps cutworms and other crawling insects from attacking the young plants.  I've seen all my peppers wiped out overnight by cutworms.  They chew the plant at the base of the stem, and then just leave the toppled leaves.  For the last few years I've been saving cans and using them like this.  It really seems to help and allows the plants to safely grow big enough without being damaged.  Then I (carefully) put the Wall O Water back over the plant, making sure the bottom is flared out and the top is at least mostly closed.  This will help retain heat, and give added protection from heavy rain and hail. 
I closed this one up after I got the picture. ;-)
And since I planted these guys we've had temperatures down in the 30's, several bad thunderstorms with sleet and hail, and heavy sustained winds.  I checked on them every day (wading through inches of water between the raised beds) and was surprised to see that they actually look pretty good.  When I put my hand inside the Wall O Waters it feels much warmer than the outside temperature, and none of the teepees was blown over in the storms either.  If we can get a few days without rain I think the beds should drain and their roots won't get waterlogged.  I really did think it would be warmer by now: normal temps for this time of year are in the 50's and lower 60's.  But NE Ohio is anything but "normal" when it comes to weather!
-Michelle of CreativeCritters

Wednesday, April 20, 2011

Featuring Shars Art Pottery

At SharsArtPottery on ArtFire.com you will find many handmade items by Sharlene Sieloff.  She creates decorative original fine art paintings and functional pottery like coffee mugs, serving bowls, flower vases, baking dishes, teapots plates, and soap dishes.  She also makes whimsical and original sculptures and enjoys working in stone, bronze and clay.  Sharlene has studied at many fine art schools including: Cranbrook Academy of Art, Pewabic Pottery, Kay Issacson School of Painting, Naguibe School of Sculpture, and Brooks School of Photographic Arts.  She has also studied under several famous artists/potter/teachers like Marie Woo, John Glick. Tom Coleman, Setphnie Birdsall, Sergio DeGuiste, Ed Chesney and others.  Sharlene enjoys making functional pottery and prefers taking her time to make small series or one-of-a-kind items.
Below is a sample of some of the wonderful items that can be found in her shop.  Be sure to pay her a visit and see everything she has to offer!Pottery Bowl Handmade Stoneware Clay Gingerbread Boys Canvas Original Oil Painting Landscape Handmade Wall Art Fine Art Lizzard Whimsical Sculpture Handmade Pottery Clay Green Blue Ceramic Trinket Jewelry Dish Handmade Pottery Stoneware Dragon 
I have to say, this is one talented lady!  I am very impressed with the quality and variety of items in her shop.  You can click on any of the pictures to view the listing, or click SharsArtPottery to view her entire shop (which I highly recommend!).
-Michelle of CreativeCritters

Tuesday, April 19, 2011

New Work in Progress- Polymer Clay Flower Garden

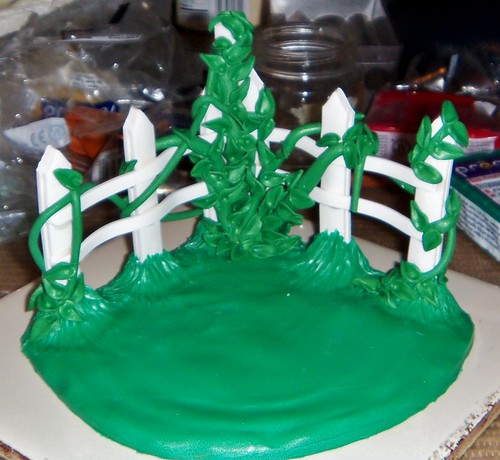
My newest polymer clay project is a flower garden sculpture, and I'm creating it in honor of my grandmother, who passed away last May.  Gramma always loved her flowers, and I took good care of them for her.  For her birthday I would always pick her a bouquet of daffodils and hyacinths, the first flowers to bloom in her yard each spring.  Each flower I'm sculpting has a special signifigance to Gramma.  This is the beginning of the sculpture.

I started by prebaking the white fence, which had wire running through it for added strength.  I set the baked fence into the clay of my base, then started adding rose vines and rose leaves.

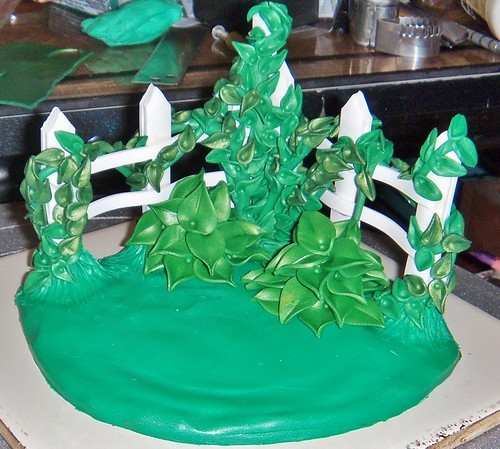
Here you can see I've added most of the leaves on the rose vines and started on two Hydrangea bushes.  Every one of these leaves was cut out one by one and thinned and shaped by hand.  I know this is going to be a very time consuming piece.  This sculpture has a lot of meaning for me, and I plan to do the best job I can.

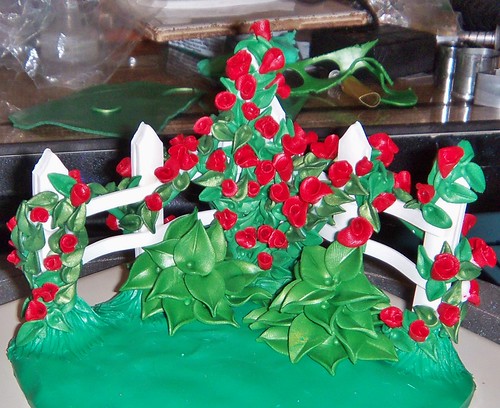
Now lots of pretty red roses have been added.  Each of these flowers is unique and was sculpted by hand.  Gramma has always had red roses growing in the back yard, and they would get absolutely full of blooms in early summer.  I'd pick her big bouquets of pretty red roses so she could enjoy them in the house.

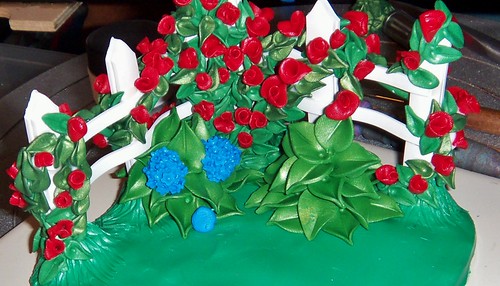
Now I've started adding the blue Hydrangea flowers.  Gramma had a Hydrangea plant right next to the front door.  That was the one plant she was able to take care of herself, for the most part.  She used to take small buckets of water and make sure her Hydrangea always had plenty of water.  Of course once I moved in I made sure all the plants and flowers were well taken care of.  Gramma loved her plants, but she wasn't physically able to take care of them.  She had bad arthritis ever since I was a child.  It made her happy to know that her plants were being taken care of though.

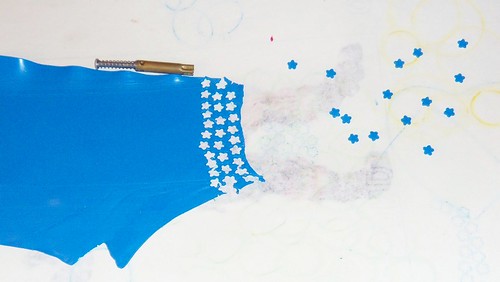
I created the Hydrangea flowers by attaching lots of tiny blue flower shapes to balls of clay.  The effect is very realistic.  It really helps that I'm very familiar with all the flowers I'll be sculpting.  I see these plants on a daily basis, and enjoy taking care of them.  They're like family ;-)

And this is where I'm at right now.  The roses are finished, and the Hydrangeas have plenty of big beautiful blooms.  I think I'll add some daffodils and irises next.  With some of these flowers I'll have to figure out how to sculpt them as I go.  I've been spending a lot of time studying the flowers in the yard very closely to see what shapes they're composed of and how they're put together. 

Stay tuned to see how this piece progresses! =)

-Michelle of CreativeCritters
Monday, April 18, 2011

Peanut Butter and Banana Roll Ups

These are delicious and nutritious and I thought of this recipe when I was trying to use up some whole wheat tortillas before they went bad.  All you do is spread peanut butter onto a tortilla, then either cut up your banana, or simply lay it in the center and then roll it up.  You can also add some Nutella or a drizzle of honey.  This is a great post workout snack too, because it provides protein and potassium, both of which help your body recover from a workout.

Just wanted to share- enjoy! =)
-Michelle of CreativeCritters
Stuffed Animals from CreativeCritters

I never really did outgrow my childhood love of stuffed animals, and once I learned how to sew my own stuffed toys I created my own little zoo.  I have a wide variety of stuffed animals available at CreativeCritters, and continue to add new critters on a regular basis.  Some are plush and sewn from soft fur fabrics, fun prints, and soft chenille,  and some are knit in different types of yarn.  My most recent addition is my knit penguin.

Cute and Cuddly Handmade Knit Penguin Stuffed Animal Toy

I created my own pattern for this funny penguin and even sculpted the eyes from polymer clay.  I like having the ability to completly customize my creations.  I've used polymer clay to make my own eyes, teeth, claws, noses, and other parts for my stuffed animals.

I also make plush teddy bears with jointed arms and legs.  These bears are just full of personality, and each is a one of a kind creation.  I use high quality fur fabric and sew the bears by hand.  Right now I have bears in blue, pink, brown, purple and white.  They range in size from my tiny 7 inch bear up to my big 18 inch tall bear.

Handmade OOAK Plush White Teddy Bear Stuffed Animal with Pink Paws

And for Easter I've got an adorable knit purple and white bunny rabbit.  The variegated purple yarn inspired this rabbit.  The color made me think of Easter, and Easter bunnies.  When I was little Gramma would always hide a stuffed animal with my Easter basket, and I just loved those bunnies!

Cute Handmade Pink Purple and White Knit Easter Bunny Stuffed Animal

And to indulge my love of fantasy I've sewn stuffed dragons as well.  This one was created using some of Gramma's floral print dresses.  The bold bright colors make this a very happy dragon!  This  large dragon is 22 inches tall and she took many hours to sew.  Her wings, claws, and tail are wired so they can be positioned into different poses.

Handmade Purple Pink and Blue Floral Print Stuffed Fantasy Dragon

My love of animals certainly shows up in my creations.  I've got everything from little ladybugs, to hedgehogs, cats, dogs, walruses, to fish and birds.  From cute and cuddly to wild and whimsical, you just never know what kind of animals might show up at CreativeCritters! ;-)

-Michelle of CreativeCritters