Wednesday, August 31, 2011
Entwined Vines- Jewelry and Fine Art by Tammy and Tina
Tuesday, August 30, 2011
Collection of Mystical Handmade Creations
-Michelle of CreativeCritters
Sunday, August 28, 2011
Nothing beats handmade soap!
Below is just a sample of the beautiful soap and other bath and beauty products Julie has available for sale.

Thursday, August 25, 2011
Fall is the perfect time to plant vegetables and herbs
Right about now is the perfect time to plant Fall crops, including those that will be harvested this fall and winter, as well as though planted in fall for an early Spring harvest.
Although there may not be much time left until the first frost, you can still get a good harvest of certain crops in the next month or two. You'll have to be sure your seedlings get plenty of water, and they may need some extra protection from the sun, but once the plants are established, they'll thrive in the cool Fall weather.Johnny's Fall Planting Calculator is a handy tool to help you figure out the dates crops need to be planted outside without season extension products. By growing your plants under row covers, your planting dates can be later than the calculator advises. You can find different weights of row covers, from lightweight to heavy, that offer different levels of frost protection. Some covers protect down to 20 degrees!
Some plants you can start growing in the Fall include Basil, beets, Broccoli Raab, broccoli, cabbage, carrots, lettuce, kale, endive, cilantro, onions, spinach, radishes, and Swiss Chard. I like to plant lettuce in the Spring and again in the Fall. All of these plants enjoy the cooler Fall temperatures and more regular rainfall. Planting in the Fall also helps make me feel better about the summer crops that are starting to \fade. I enjoy replacing those dried up and yellowing cucumber vines, summer squash plants, and other warm weather crops with bright green little seedlings that will fill the garden with color (and food) right up until the first frost, or even longer if you use row covers. Plus working in the garden is even more pleasant when it's a comfy 60- 65 degrees, versus the 85- 90 degrees of July! So get out there and get your hands dirty- you'll reap the rewards of your labor in no time!
Happy gardening! =)
-Michelle of CreativeCritters
Find my e-books on Smashwords and Amazon
Sunday, August 21, 2011
My book What To Do With Extra Zucchini is now available!
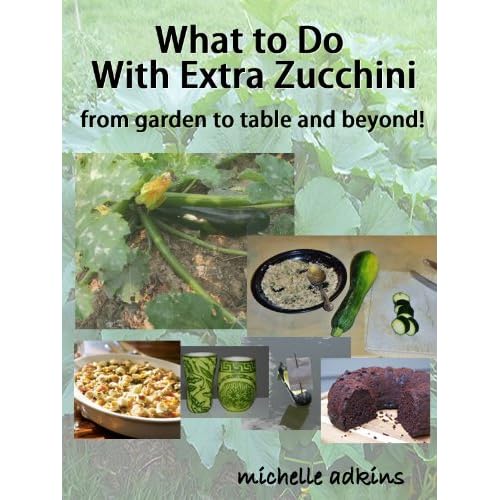
If you want your zucchini to be all that they can be, from artistic design expressions to community zucchini racing and zukapaults, this is the book for you.
Friday, August 19, 2011
Polymer Clay Smooshers Fall Challenge
Because of the hot weather last month I was unable to sculpt an entry for the Polymer Clay Smoosher's Beach themed Challenge. I love participating in the Smoosher's Challenges and really regretted being unable to sculpt for about a month. Polymer clay can get very sticky and difficult to sculpt when it gets too warm, plus I didn't want to add the heat of the oven to the already hot house. The weather has cooled off a bit in the last week or so, though, so I have been able to get back to sculpting. I had plenty of ideas for items I could create for the Fall themed Challenge, but eventually settled on a Fall Fairy Maple Leaf wall hanging. I've had an idea like this for quite some time, and this seemed like the perfect time to sculpt it.
The red, green, and gold Maple leaf measures 9" tall and 11" wide. I drew a template for the leaf on cardboard, then traced around the leaf on the clay using an exacto knife. I made the leaf even stronger by using wire for the leaf veins and covering them in clay. The fairy was sculpted from the same clay as the leaf and is meant to look like part of the leaf. The really fun part came when I started adding red, green, and gold Pearl Ex powders to the unbaked clay, then covered the entire leaf in Ultra Thick Embossing Enamel. This is the first time I've used the embossing enamel, although I do frequently use embossing powders in my work. Because the embossing enamel is crystal clear I was able to add a thick layer, adding to the depth of the piece. I baked the piece once, and liked the look so much I wanted to add another layer of color. So I dusted on more Pearl Ex powders, and another layer of embossing enamel, and baked the plaque again. This is definitely a one of a kind creation! And I think it's perfect for the Polymer Clay Smoosher's Fall Challenge. Autumn always seems to bring on a burst of creativity for me, and I have quite a few Fall themed items available in my shop. Over the next month or so I'll be adding a variety of new items inspired by the upcoming Fall season!
Wednesday, August 17, 2011
How To Preserve Tomatoes in the Freezer
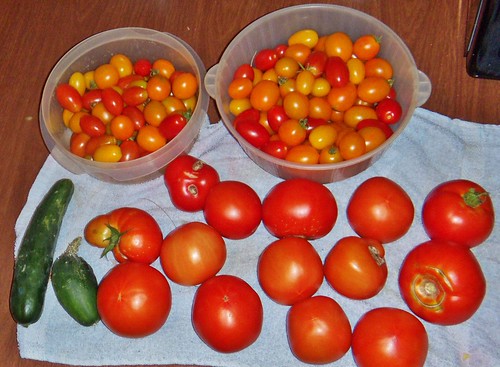
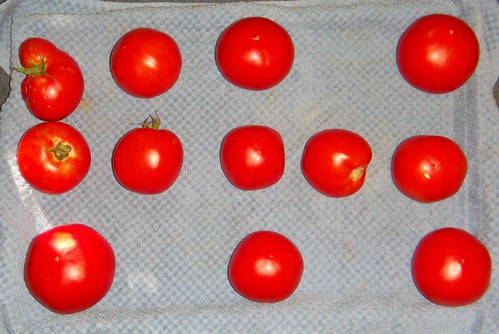
In my neck of the woods the tomatoes are producing like mad right now. I have quite a few tomato plants in the garden, including Roma tomatoes, yellow pear tomatoes, yellow cherry tomatoes, a few types of red cherry tomatoes, and a few larger unknown varieties. With all the rain and warm temps we've had over the last few months the vines are absolutely loaded with fruit, and I pick a good sized basket full every day now. I've already used some of the larger tomatoes for chili and a chicken dish, and I munch on the cherry tomatoes like they're candy. I still end up with more tomatoes than I can use before they go bad though. I know many people like to can tomatoes, but the thought of adding even more heat to an already hot house isn't very appealing to me. Several years ago I discovered that you can preserve tomatoes very simply by freezing them. Just place your washed and dried tomatoes in a single layer on a cookie sheet (I put a towel on my so the tomatoes don't get bruised) and put the sheet in the freezer. Use the best tomatoes you can for this. Try to avoid freezing tomatoes with bruises, spots, or other damage- use those fresh and just cut out the bad spots.
Let the tomatoes harden up for several hours until they're frozen solid. Then you can just store them in a freezer bag and pull out what you need as you need it. To thaw the tomatoes you can put them under running water. As the tomatoes thaw the skins slip off, which is very convenient. This works for any size or type of tomato. Don't try to put them in the bag before they're frozen because they'll probably get squashed and it will be a mess when you go to thaw them out. (Trust me, I'm speaking from experience- LOL). I usually end up with enough preserved tomatoes to get me through the winter and following spring. And when you freeze them at the peak of ripeness like this that delicious flavor (along with all those healthy nutrients) is preserved beautifully. I turn my tomatoes into pasta sauce, chili, tacos, and all sorts of delicious things. They blend beautifully with the garlic, onions, peppers, eggplant, and fresh herbs from my garden.
I just wanted to share this useful little tip for preserving tomatoes- it's saved me a lot of time and tomatoes!
Thanks for stopping by! =)
-Michelle of CreativeCritters
Saturday, August 13, 2011
Leopold the Loom Knit Lion
Wednesday, August 10, 2011
Composting Has Many Benefits and is Easy To Do
Green plant matter includes: lawn clippings, old vegetable vines, weeds that haven't gone to seed, hedge clippings, vegetable and fruit skins and trimmings.
Dry plant matter includes: fallen leaves, straw, small twigs, cornstalks, and black and white newspaper.
To make your compost:
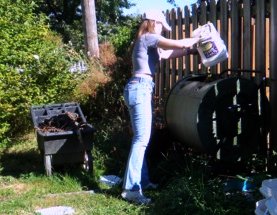
1. Combine your ingredients in a compost bin (I use a Compost Tumbler, which works well in the suburbs). You want your mixture to include both green and dry materials. To speed up the composting process you can chop or shred the materials and add compost inoculant (available from most organic gardening sites).
2. Moisten the pile with the hose, but don't saturate it. You want it evenly moist, but not sitting in water.
3. Turn the pile at least once a week. I usually turn mine every few days to keep everything well mixed. This allows air to move through the pile so the microbes get enough oxygen to break down the materials quickly.
4. Allow the compost to cook. You want the pile to get nice and hot (I've had mine up to about 120 degrees) in order to kill any pathogens and weed seeds. Check the pile regularly, especially during hot weather, and water as necessary to keep it moist. In about a month you can start checking for finished compost. When it's ready to be used in the garden it will be dark, moist, and crumbly. It won't smell rotten, but will actually have a sweet earthy odor.
Happy gardening! :-)
-Michelle of CreativeCritters


