
Well, Rudy the dog now has a body, legs, and a tail. I sculpted most of the head first, and baked it to preserve the details. One of the nice things about polymer clay is that it can be baked repeatedly, and fresh clay added at any point. I sculpted the head around a foil core with a heavy gauge wire embedded in it. After the head was baked I inserted the wire into the foil core of the body and used clay to attach the head to the body.

The front legs were sculpted over thick wire coated in Tacky glue. The sculpture needs a stable base. I bent the ends of the wire and inserted them into the foil core of the body. Right now this is just a rough base to start with. More clay will be added to smooth and shape the legs and body after it's been baked. Deciding when to bake can be difficult sometimes. I considered adding more clay before baking, but the legs just didn't feel stable enough. After the piece has been baked it will be much easier to add clay without distorting or moving anything.
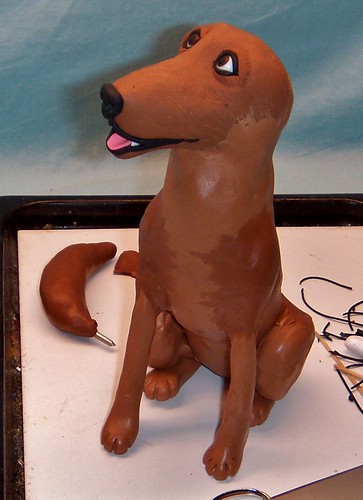
Since I'll be painting Rudy after the final bake, the color of the clay used isn't that important. I am using Premo polymer clay exclusively because of it's strength and the way it holds details. It's my favorite brand of clay to work with, especially when I'm sculpting animals. The fur seems to flow so nicely when I texture it. I'll share more about that in the next post, when I start adding the fur. You can also see that I've started the dogs tail. I shaped foil around a wire, then covered that in clay. I left enough wire uncovered to insert into the body.
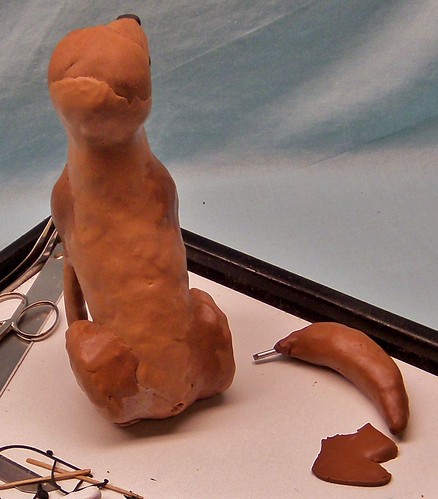
I peirced a hole in the rump first, and added the fur texture to most of the tail before attaching it to the body. You'd be surprised at how long it can take just to texture one dog's tail! I am pretty meticulous though. I have a few good pictures of Rudy''s tail for reference, so I know just how I want it to look.

First I textured the bottom of the tail, then I was able to do the top after I attached the tail to the body.
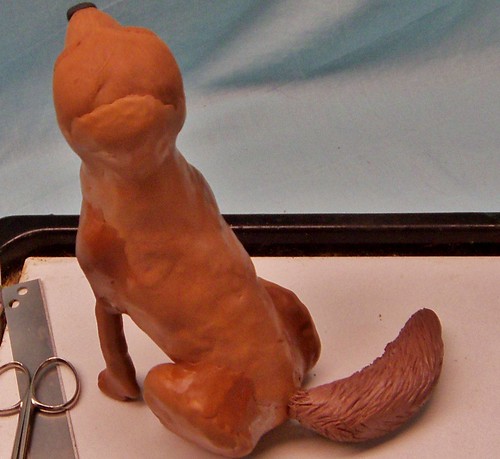
I textured the fur right up to the body, even though I'll be adding fresh clay to the base of the tail and rump. The texture will help the unbaked clay stick better, and I'll be able to pull the lines of the fur from the unbaked clay onto the baked fur seamlessly. And now Rudy, the Irish Wolfhound/ Collie mix, is ready to go into the oven. This is always a slightly nervous time for me. I don't want anything break, or sag, or burn. I'll often cover more delicate parts with aluminum foil.
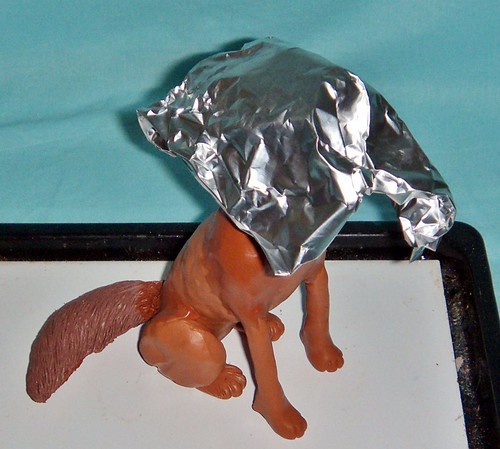
It looks funny, I know, but now his light colored eyes, tongue, and teeth won't darken or scorch. Once the piece has been baked and cooled I'll start smoothing out the lines of the body, filling in the areas that need more clay. Once I've got the final shape I'll start adding the fur texture. But that's for the next post ;-)
Thanks for joining me on another creative journey! Stay tuned to see the final results!
-Michelle of CreativeCritters


No comments:
Post a Comment